White toner transfer process: How does it work?
White Toner – Guarantees high opacity for all colours on the fabric, particularly white on a dark background, as well as offering a new level of flexibility in textile finishing.

The white toner transfer process is frequently used in textile finishing. It guarantees high opacity for all colours on the fabric – particularly white on a dark background – as well as offering a new level of flexibility in textile finishing. This eliminates the need for weeding. The suitable Oki printer for this is available in our Yow! online shop. If you read through the following tips and instructions, you’ll realise that the white toner process isn’t that complicated at all.
You will need:
Before you start the transfer, we always recommend that you check the offset settings. Depending on the environment (e.g. temperature, humidity) and the nature of the substrate, the required transfer parameters may differ from the recommended standard values. If necessary, you can adjust these manually on your transfer press.
1. Print your design in mirror image onto the matt side of the A-foil using our OKI printer
—> For full-surface white designs or any coloured designs, a longer transfer time is required
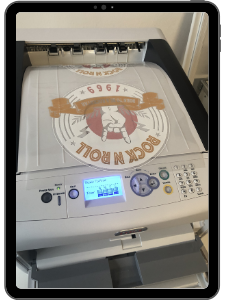
2. Set the heat press to 165 degrees
3. Trim approximately 1 cm off the right-hand and top edges of the B sheet
– Fold a small corner of the B paper upwards to make it easier to peel off later
– Place the printed side of the A-foil, B-paper and crease-free baking paper in the centre of the preheated heat transfer press
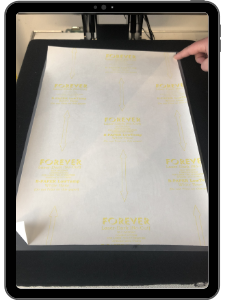
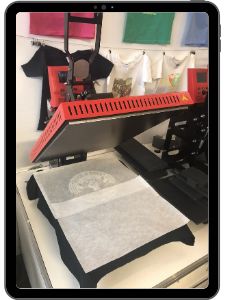
4. Set the timer to 120 seconds and then close the heat press
5. First, remove the baking paper and leave the transfer in the press
—> Tip: Rub a piece of cloth over the transfer to remove any adhesive residue
– Now peel off the B paper from the folded-up corner in a slow, smooth motion
– Now trim off the edges of the A film so that the adhesive edge isn’t transferred onto the fabric
– The B-paper can be discarded
6. Start by pressing your garment for 10 seconds to prevent creases
—> Set the timer to 10 seconds and close the transfer press
7. First, place your fabric on the base plate and position the A-foil on the fabric with the design facing downwards
—> Tip: Secure the corners of the cling film with heat-seal tape and place the baking paper on top
– Set the timer to 30 seconds and close the press
8. Remove the fabric from the press and place it face down on a table to cool
—> Instead of waiting for the transfer to cool down, you can use the time to start the next transfer straight away
9. Then peel off the film by unrolling it slowly, evenly and flat off the fabric
– The A-film should remain as close as possible to the fabric whilst you peel it off
10. To improve the transfer’s wash fastness and feel, it is essential to press the fabric again with a finish (matt or gloss)
– Place the fabric with the transfer facing upwards on the base plate and lay the finish on top
– Set the timer to 10 seconds, press and you’re done!

Have fun giving it a go!