Spruce up your home – with adhesive film
Are you starting to get a bit fed up with your old furniture? There’s no need to throw it in the bin. Give it a new lease of life – with adhesive film!
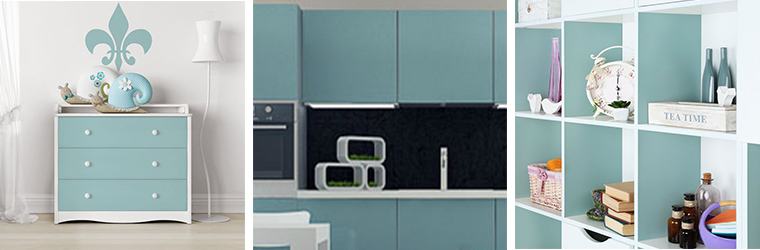
However lovely Grandma’s wardrobe or that old wooden shelf you found in the loft may once have been. These days, the sight of these pieces of furniture just makes you grimace. But that doesn’t mean they belong on the bulky waste collection by any means! DIY enthusiasts can easily give old furniture a new lease of life – with adhesive film. YOW! shows you how.
Adhesive film – the decorative all-rounder
Most people use furniture film solely to protect their furniture from surface damage. Yet adhesive film is capable of so much more. Available in a wide variety of colours, patterns and finishes, it offers a unique form of decoration that instantly lends every home a highly personal and individual touch. If you’re looking for something that really catches the eye, you should take a look at Oracal 975 Structure Design film. This multi-layered, cast, high-performance PVC film has been specially developed for decorative surface finishing and is available in a wide range of colours. Special blackboard film has also been growing in popularity over the past few years. This space-saving alternative to the traditional chalkboard isn’t just used in children’s bedrooms to capture creative doodles and notes. If you’re particularly interested in blackboard film to spruce up your home, we’d recommend taking another look at this article.
Easy to use
Our self-adhesive films are scratch-resistant, grease-, dirt- and water-repellent, and offer good resistance to UV rays. This means they perform well even in bright, light-filled rooms thanks to their durability and are ideal for use on kitchen units or in the bathroom. All adhesive films can be easily cleaned with a damp cloth and can be removed without leaving any residue, even after several years. So, should you ever get tired of your film, you can simply peel it off again. This means you can give your windows, doors and furniture a makeover whenever you feel like it. Applying the film is also child’s play and can be done in just four simple steps.
How to give your furniture a new lease of life with adhesive film – here’s how
Step 1: Cleaning
When applying self-adhesive film, it is very important to ensure that it is applied to a surface that is free from dust, dirt and grease. Otherwise, unsightly bubbles may form on the surface, and the film’s optimal adhesion can no longer be guaranteed. You must therefore always clean the surface to be covered beforehand with a little warm water and washing-up liquid. Any small loose splinters of wood and flaking paint should also be removed before proceeding. Then wipe the surface thoroughly dry and, ideally, leave it to air-dry for a while.
Step 2: Cut the film to size
Now turn your attention to the film. Cut it to size so that its actual surface area is a few centimetres larger than the area you want to cover. You can simply fold over or trim off these excess edges at the end.
Step 3: Apply the film
There are two ways to apply the film: dry application and wet application. Dry application is generally a little easier than wet application and is therefore particularly suitable for beginners. To do this, peel back the protective film on the back of the adhesive film a little and position the film at one edge of the piece of furniture. You can now apply the film bit by bit across the entire surface. Use a squeegee to smooth the film down with sweeping motions. As you do so, slowly peel back the film further and further until the entire surface is covered. You can then fold the film over the edges or trim it to size with a craft knife. Tip: If the film isn’t sitting quite right at the end or has bubbles, you can easily peel it off and reapply it.
Particularly with larger surfaces, wet application is usually the safer way to achieve a bubble-free result. To do this, first moisten the surface to be covered with a solution of washing-up liquid and water (1 tsp washing-up liquid to 1 litre of water) so that the film can be laid on ‘floating’. The water makes it very easy to position the film exactly where you want it. Then press the film down carefully, working from the centre out towards the edges. Use the squeegee to remove any excess water and air bubbles as you go. Make sure you do not use the finished piece of furniture as normal until it has dried completely. Otherwise, the film may peel off unintentionally.
(Cover image source: www.bilderwelten.de)